Overview
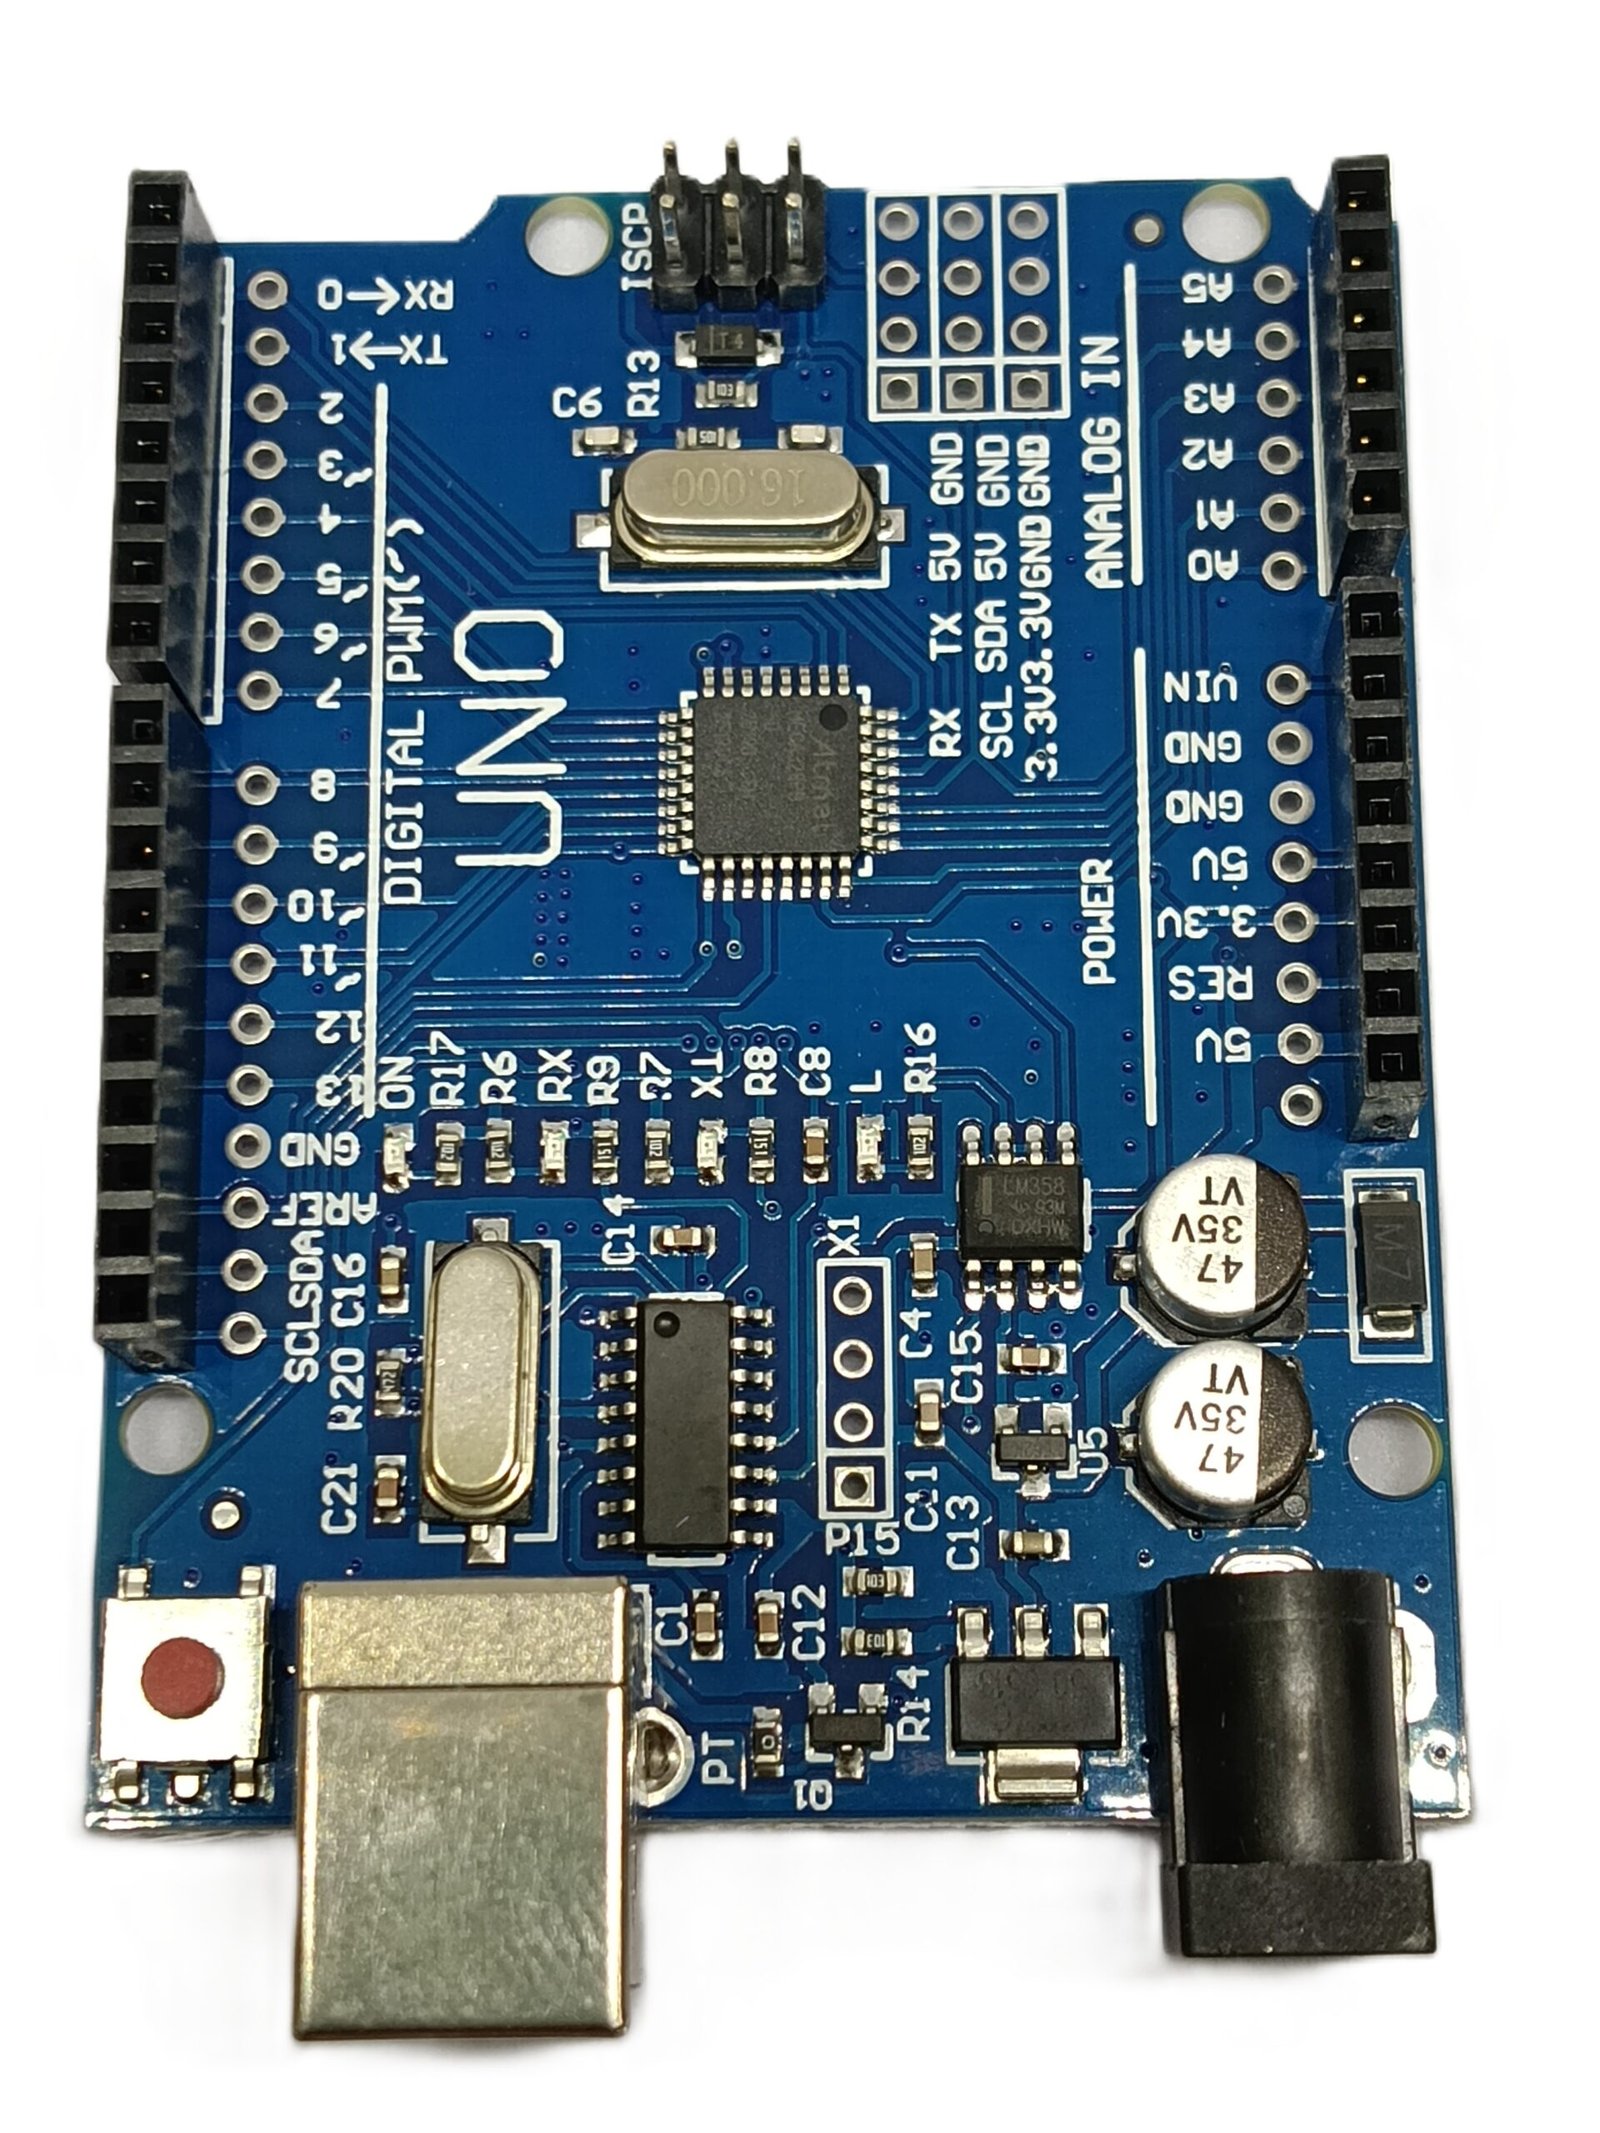
The Arduino Uno R3 is a versatile microcontroller board based on the ATmega328P microcontroller. It is designed for both beginners and experienced developers to create interactive electronic projects. With its user-friendly interface and extensive community support, the Arduino Uno R3 is an ideal choice for prototyping and building IoT devices.
What's in the box
- 1 x Arduino Uno R3 board
- 1 x USB cable
- 1 x Starter guide
Key features
- Microcontroller: ATmega328P
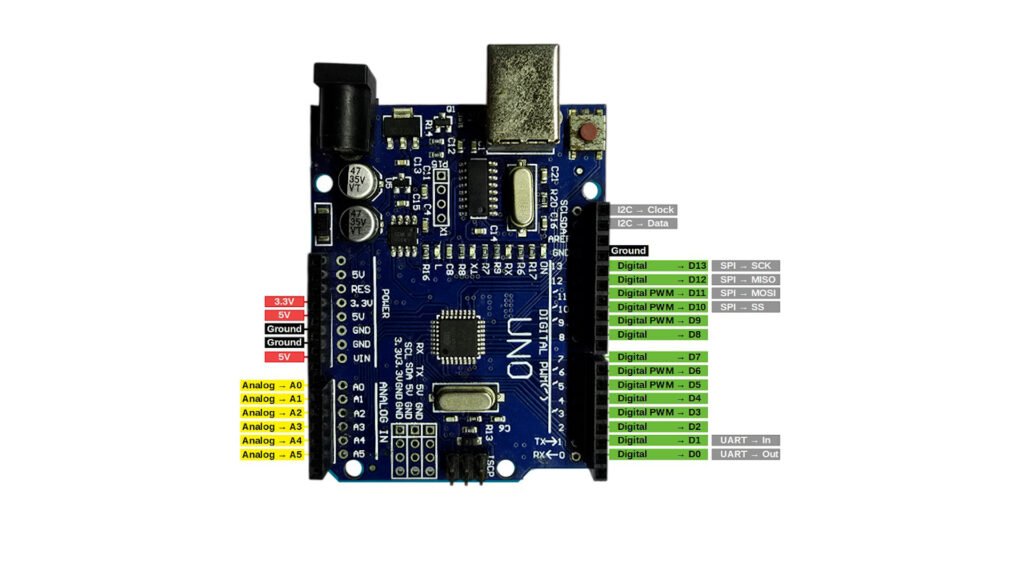
- Digital I/O Pins: 14 (6 can be used as PWM outputs)
- Analog Inputs: 6
- Clock Speed: 16 MHz
- USB Connection: For programming and power
- Power Jack: For external power supply
- ICSP Header: For programming the microcontroller
- Reset Button: To reset the board
How it works
The Arduino Uno R3 operates by executing a series of instructions written in the Arduino programming language (a simplified version of C/C++). You can upload your code to the board via the USB connection. Once programmed, the board can read inputs from sensors and control outputs like motors, lights, and other devices.
Getting started
- Install the Arduino IDE: Download and install the Arduino Integrated Development Environment (IDE) from the official Arduino website.
- Connect the Arduino Uno R3: Use the USB cable to connect the board to your computer.
- Select the board in the IDE: Open the Arduino IDE, go to Tools > Board, and select 'Arduino Uno'.
- Select the port: Go to Tools > Port and select the COM port that corresponds to your Arduino Uno.
- Write your code: Use the Arduino IDE to write your program. You can start with simple examples provided in the IDE.
- Upload your code: Click the upload button in the IDE to send your code to the Arduino Uno R3.
- Test your project: Once uploaded, your project should start running as per your code.
Tips
- Start with simple projects to familiarize yourself with the board and the Arduino IDE.
- Utilize the extensive online community and resources available for troubleshooting and project ideas.
- Experiment with different sensors and actuators to expand your project capabilities.
Safety
When working with electronic components, always ensure that you are following safety guidelines:
- Work in a dry environment to prevent short circuits.
- Do not connect the board to a power source beyond its rated voltage.
- Handle components with care to avoid damage.